
Hi fellow quilters,
I know, we’ve been promising to show you how to do paperless paper piecing for a while, teasing you a bit. Today is your lucky day! Sharon loves to paper piece and doesn’t mind removing all of the paper when she’s finished sewing her blocks. Susan doesn’t mind the paper piecing, but HATES removing the paper at the end. Sharon was poking around on the internet and found this fun technique that solved Susan’s problem! (I know- what a great sister, right?)
Now that you have seen Hibernation Vacation, we thought we’d take this opportunity to show you how Susan made the paper pieced waves without removing any paper at the end! You can use this technique for any foundation paper pieced pattern, but it is especially nice for those projects when you’re making several blocks that are the same design.
Here we go!
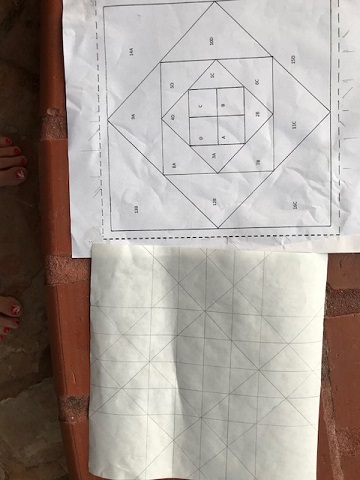
Step 1: Trace your pattern onto freezer paper. I know (groan) tracing can be tedious, but focus on the part where you don’t have to remove the paper later! Write the labels from the pattern on the paper side of the freezer paper so that you can figure out the order for piecing. Since the freezer paper is reusable and Susan was planning to make waves going both directions, she kept the piecing diagram next to her machine so she could follow along that way.
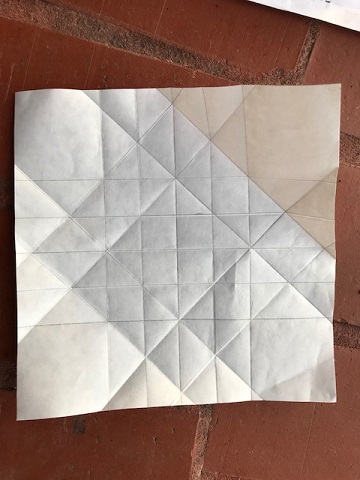
Step 2: Fold on all of the lines you just drew. The “sticky” side of the freezer paper will be on the bottom, so you will be folding towards the top. Susan found that if she folded it towards the back first so she could use the lines on the top to make sure she was straight and then folded it the other way, it was easier to make certain she was folding the lines correctly.
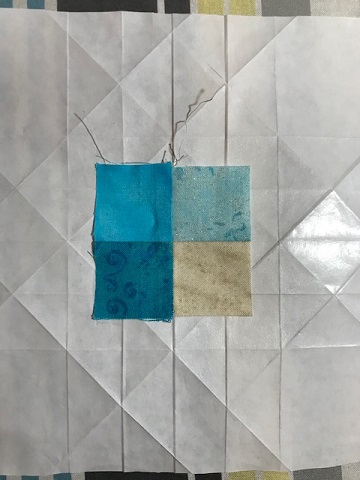
Step 3: Position the first piece and iron it in place. (Usually this would be a single piece of fabric, but our wave pattern starts with a little 4-patch block instead.) Note that she is ironing onto the waxy side of the freezer paper. Susan used a cute little mini iron to attach the pieces to the freezer paper so she wouldn’t get her big iron sticky from the wax. That would be a big mess to clean up later, wouldn’t it!
Step 4: Fold the paper along the fold to expose the fabric, and then trim the fabric edges to 1/4″ as shown in the picture . This will become your seam allowance.

Step 5: Line up the next piece which needs to be sewn onto the design with trimmed edge of the first piece of fabric, leaving the paper folded back.
Step 6: Sew right along the folded edge of your paper, sewing through the two layers of fabric, but NOT the paper.

Step 7: Iron the new seam, pressing to one side, and trim your 1/4″ seams (like we did in Step 4) to get ready to add the next piece of fabric.
Step 8: Continue trimming, sewing and pressing as you add each fabric piece for the design. Just follow the order for piecing from the original piecing diagram until all of the pieces have been added to your block.

Step 9: Yay! Everything is now in place. Measure carefully make certain that your square is the correct size and trim if necessary. Don’t forget to leave your 1/4″ seam allowances all around the edges of the block.
Step 10: Remove the paper from the back. Ta-da! Just look how pretty the seams are and there aren’t any little paper shards that need to be removed

The key to this technique is to fold the freezer paper carefully when you start so that all of your points end up perfectly pointy (like they would in regular paper piecing) and in the end you have no need to fuss with those dratted little shards of paper! Another nice thing is that if you don’t set your iron too hot, you can use the folded freezer paper again to make another block without going through the process of tracing and folding the pattern template again.
Our Mom was intrigued by the paperless paper piecing technique, so we had a fun sewing afternoon together while I taught her the basics. Here’s Mom’s finished project all ready to quilt! Isn’t it pretty!

We hope you have enjoyed this quick little “how to” today! We’d love to hear how this technique will influence your future projects! Or better yet, give it a try and send us a photo for our customer quilt gallery.
Happy Quilting!
Susan
Ms. P. Designs USA

I like this method better than picking out paper!! LOL Plus, you could use printable freezer paper and shoot it through the printer (I think!!)
LikeLike
Mind blown! Whoa! I need to try this!
LikeLike
Hi Sharon and Susan! What a good sister to find a paperless technique. I am not a fan of paper piecing. I haven’t done it for many years but it is on my to-do list for the new year. My plan is to try both techniques, although paperless sounds wonderful to me. Thank you for sharing! ~smile~ Roseanne
LikeLike
Wonderful tutorial! Thank you for the new and fresh paper piecing approach:). I am excited to give it a try❤️
LikeLike
This is awesome. I love paper piecing but hate removing the papers. THANK YOU SO MUCH!! Toni Vitrano
LikeLike