Hi Quilting Friends,
Welcome back to the “Black & White Delight” Quilt-Along. If you’re just joining us, you may want to have a look at the “Welcome” post to help you catch up.
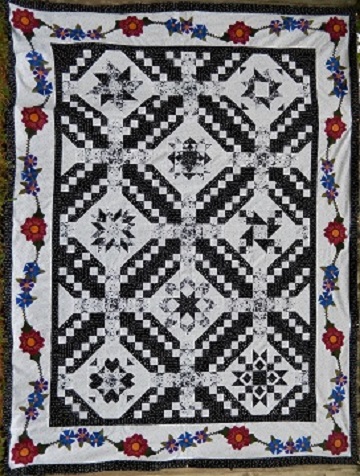
We’ve had lots of fun with our “Black and White Delight” quilt project, but we’re almost done now. Are you ready?
- Finished applique borders
- Sewing machine
- Iron & ironing board
- Scissors for snipping thread
- Beverage & snack(s) for hydration and energy!
Have you had fun making your applique borders? I hope so! Today’ we’re going to attach them to the finished quilt top. This is going to be fairly quick and easy.
Begin by adding the side borders. I like to pin or clip the borders to the edges of the quilt top to help me manage the bulk and to permit even easing of any extra length, should that be necessary. Stitch the side borders to the quilt top, using a 1/4″ seam. Press the seams toward the center of the quilt.
Repeat the process above with the top and bottom borders.
If you left some vines or flowers unstitched, now is the time to finish stitching them. For my layout, that meant that I needed to finish stitching one piece of vine and one large leaf at each corner of the quilt. See how the vine crosses the seamline? I couldn’t stitch the vine down or applique the leaf that the vine goes beneath until after the seam at the corner of the quilt was sewn.

And that’s it for today! Easy peasy, right? We’d just love to see your project! Please share a picture on Instagram:
#bwqal_yourname @mspdesignsusa
Next week we’ll add the final border to our quilt top! Until then, may your stitches be straight, your bobbins full, and your seam ripper languishing in the sewing basket.
Happy quilting,
Sharon
