
Welcome back, Quilting Friends!
Today we’re going to be cutting up (our fabric) for the “Black and White Delight” Quilt-Along! If you’ve just joined us, you may visit the “Welcome” post for more information about the Quilt Along.
Before we get started, make sure that you have the following tools & supplies:
- Your fabric for the project (Isn’t it GORGEOUS!!!)
- Rotary cutter with a nice sharp blade
- Your favorite ruler(s)
- My favorites include:
- 5″ by 22″ for WOF strip cuts
- 3.5″ by 12.5″ for smaller cuts
- 12″ square for larger squares
- My favorites include:
- Rotary cutting mat
- Plastic zipper bags, 9 sandwich-sized and 1 gallon-sized
- Sharpie for bag labels
It is very important to have a nice, sharp blade in your rotary cutter, to ensure that your cuts will be clean and smooth. So, if you haven’t changed out your blade in a while then you might want to do so before you start cutting. I usually take my cutter apart and remove the lint that collects around the blade holder whenever I change my blade. A little drop of sewing machine oil on the moving parts doesn’t hurt either.
Safety first! Always be aware of the position of your fingers (and other body parts) as you cut. Move them toward the edge of your ruler, away from where your cutter will be rolling. Always cut away from your body. Turn the board if necessary, or move to the other side of your cutting table. Pay attention to the task at hand; distractions can result in injuries and, even worse, bleeding on your fabric. I speak from personal experience, unfortunately, and I have a scar to prove it. (But I didn’t bleed on the fabric, only everywhere else.)
Let’s start by printing out a copy of the cutting instructions, found on page 2 of your pattern packet. As you can see, the cutting instructions provide the size & amount of pieces to cut from each fabric. Further, they let you know where each piece will be used in your quilt.
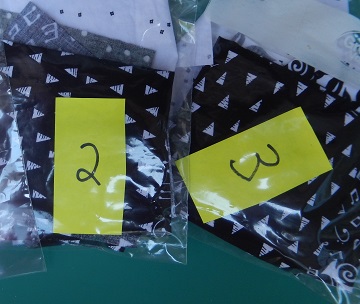
Since we’re cutting out all of the pieces for the quilt in one session, you’ll need to have a way to organize the pieces. (And there are a LOT of pieces!) I decided to use sandwich-sized zipper bags, one for each block and another for the pieced borders. I used colored sticky notes to label my bags, since they show up better in the photos here, but you could just write on the outside of the bags instead. I used a gallon-sized bag for my Wild Goose Chase pieces, since there are a lot of them. The 4-patch strips, applique borders, and binding pieces were folded and set aside for later. Here are my bags of fabric pieces for Block 2 and Block 3:
I found that it worked best for me to make a little check mark on my cutting chart, right next to each line, as I cut my way through the fabric. It helped me remember what I had cut (and NOT cut, yet), in case I was interrupted or needed to take a break. (Never do rotary cutting without taking an occasional break for a delicious snack or a beverage. You don’t want to become hangry or dehydrated while you’re having fun.) It also helped to have my bags lying near my cutting mat, so the pieces could be sorted and added to the correct bag as soon as they were cut out.
I usually begin by cutting the largest pieces and then work my way down toward the smallest pieces with each piece of fabric . This strategy seems to work well, and it leaves little fabric waste. Set aside all of your leftover fabric and wait to use it until your quilt is completely finished. (I’ve been known to use the leftover fabrics for other projects, and then regret it later on.) It is possible that you might make a boo-boo while you sew and need to cut out a new piece, or you may decide that you want to change out one fabric for another in your block.
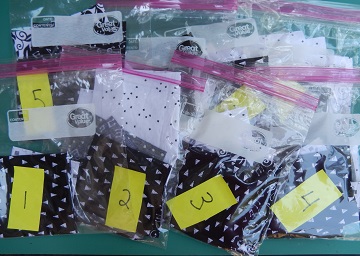
It took me about 4 hours to cut and organize all of the pieces for my quilt, and here they are!
Please snap a picture of your cut-out fabrics to post on Instagram. Easy peasy, and we’d love to see it!
#bwqal_yourname @mspdesignsusa
May your cuts always be straight and your blades always be sharp! Next week we’ll start sewing! (Yay! We LOVE to sew, right?) So get your sewing machine ready to stitch along, and then come back to join me for “Those Fabulous Four-Patches”.
Happy quilting,
Sharon

The fabrics do look great. =)
LikeLiked by 1 person
Thanks, Susan!
LikeLike